Growing up in a small coastal town, family dinners were the heart of our home, and stuffing was always a dish that brought everyone closer around the table. My Garlic Herb Stuffing recipe takes me back to those evenings when simple pantry staples turned into soulful comfort food. I still remember the first time I tried to fix an oversalted chili, experimenting with beans and tomatoes to balance flavors—an early lesson in how a few thoughtful ingredients can transform a dish. This stuffing carries that same spirit: straightforward, satisfying, and crafted with a home cook’s love. Whether you’re a seasoned pro or just starting out, this Garlic Herb Stuffing is designed to be approachable and full of flavor, perfect for making any meal feel like a cozy family gathering.
Table of Contents
Why You’ll Love This Garlic Herb Stuffing
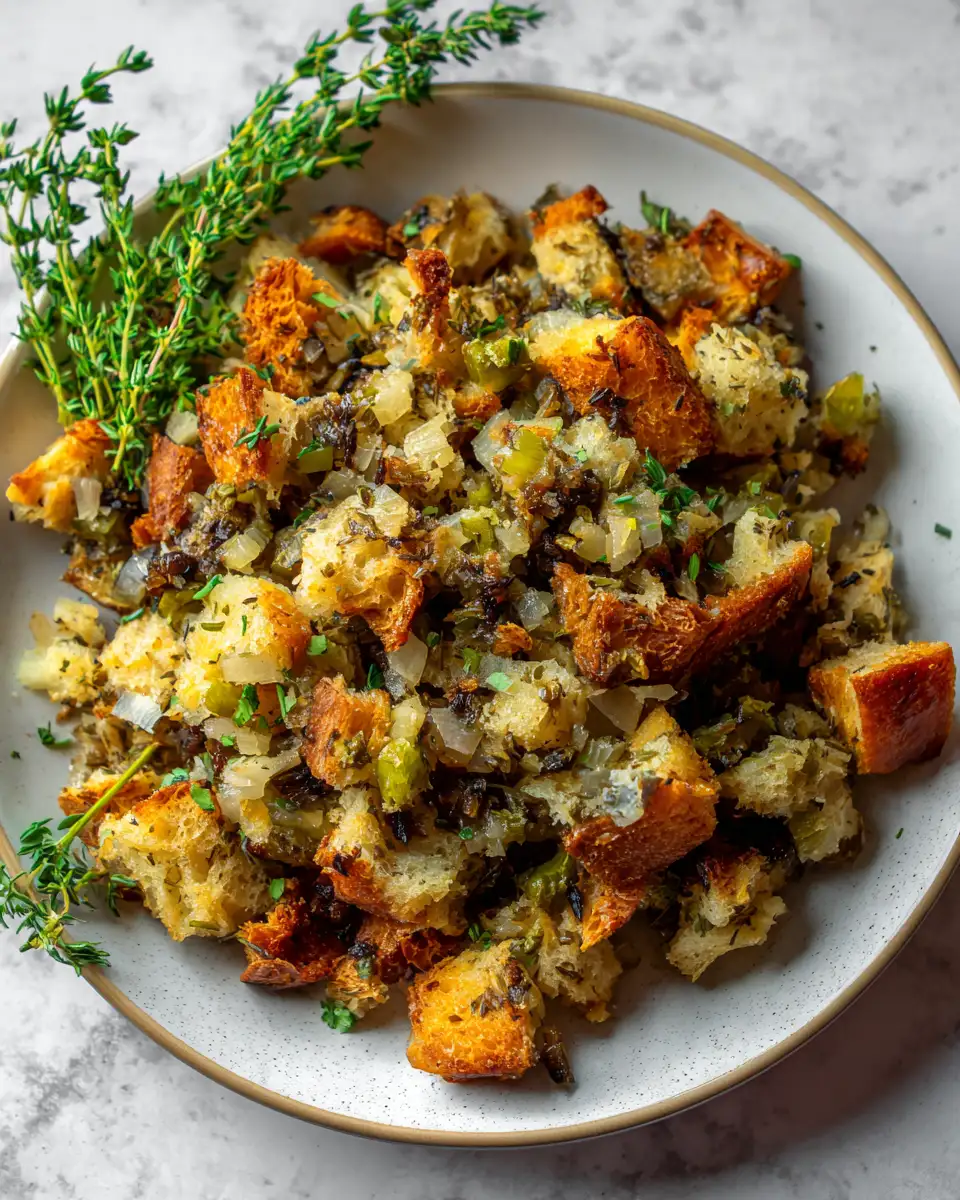
There’s something truly special about Garlic Herb Stuffing that makes it a timeless side dish. From my experience hosting those budget-friendly Wednesday dinners in college, I learned that a great stuffing is more than just a filler—it’s a centerpiece that can hold its own alongside any main course. This recipe brings together the warm earthiness of herbs, the comforting aroma of garlic, and the tender texture of perfectly moistened bread cubes. It’s the kind of dish that feels both nostalgic and fresh, a nod to family traditions while staying easy enough for a weeknight meal.
What I love most is how forgiving and flexible this stuffing is. Whether you’re using day-old bread from your pantry or want to swap herbs based on what’s in your garden, it adapts beautifully. Plus, it’s made in one pan, which means less cleanup—something every home cook appreciates. This Garlic Herb Stuffing also pairs wonderfully with everything from roasted chicken to simple sautés, making it a reliable go-to in my kitchen.
Ingredients You’ll Need for This Garlic Herb Stuffing

- 10 cups cubed day-old bread (a mix of white and whole wheat works well)
- 4 tablespoons unsalted butter
- 1 medium yellow onion, finely chopped
- 3 stalks celery, diced
- 4 cloves garlic, minced
- 1 tablespoon fresh sage, chopped (or 1 teaspoon dried sage)
- 1 tablespoon fresh thyme leaves (or 1 teaspoon dried thyme)
- 2 tablespoons fresh parsley, chopped
- 2 cups low-sodium chicken broth (or vegetable broth for a vegetarian option)
- 2 large eggs, lightly beaten
- Salt and freshly ground black pepper, to taste
- Optional: 1/2 cup chopped walnuts or pecans for added crunch
If you’re out of fresh herbs, dried work fine—just remember to use about a third of the fresh amount since dried herbs are more concentrated. For the bread, I’ve often used whatever was around: a crusty baguette, sandwich bread, or even cornbread for a different twist. The key is letting it dry out a bit so it soaks up the broth without turning mushy.
Nutrition Facts
- Calories: Approximately 280 per serving (based on 8 servings)
- Protein: 7g
- Fat: 12g
- Carbohydrates: 34g
- Fiber: 3g
- Sugar: 3g
- Sodium: 450mg (can be lowered by using low-sodium broth and controlling added salt)
Because I’m all about balance, this Garlic Herb Stuffing offers a moderate calorie count, making it a comforting side that won’t tip the scales. The eggs add just enough protein, and the butter gives it that silky mouthfeel without going overboard. If you’re watching sodium, opting for low-sodium broth and seasoning gradually is a small tweak that makes a big difference.
Print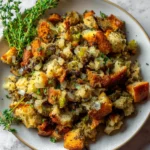
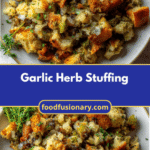
Irresistible Garlic Herb Stuffing Recipe That Will Elevate Your Holiday Feast
- Total Time: 45 minutes
- Yield: 4 servings 1x
Description
Learn how to make delicious Garlic Herb Stuffing. Easy recipe with step-by-step instructions.
Ingredients
- 10 cups cubed day-old bread (a mix of white and whole wheat works well)
- 4 tablespoons unsalted butter
- 1 medium yellow onion, finely chopped
- 3 stalks celery, diced
- 4 cloves garlic, minced
- 1 tablespoon fresh sage, chopped (or 1 teaspoon dried sage)
- 1 tablespoon fresh thyme leaves (or 1 teaspoon dried thyme)
- 2 tablespoons fresh parsley, chopped
- 2 cups low-sodium chicken broth (or vegetable broth for a vegetarian option)
- 2 large eggs, lightly beaten
- Salt and freshly ground black pepper, to taste
- Optional: 1/2 cup chopped walnuts or pecans for added crunch
If you’re out of fresh herbs, dried work fine—just remember to use about a third of the fresh amount since dried herbs are more concentrated. For the bread, I’ve often used whatever was around: a crusty baguette, sandwich bread, or even cornbread for a different twist. The key is letting it dry out a bit so it soaks up the broth without turning mushy.
Instructions
- Preheat your oven to 350°F (175°C). Lightly grease a 9×13-inch baking dish and set it aside.
- Spread the bread cubes on a baking sheet and toast them in the oven for about 10-15 minutes until they’re dry and just starting to crisp at the edges. This step helps the bread soak up the broth without becoming soggy.
- While the bread toasts, melt the butter in a large skillet over medium heat. Add the chopped onion and celery and cook until softened, about 5-7 minutes. You want the veggies tender but not browned.
- Add the minced garlic and cook for another 1-2 minutes until fragrant. Stir in the fresh herbs—sage, thyme, and parsley—and cook for 30 seconds to release their aroma.
- Transfer the toasted bread cubes to a large mixing bowl. Pour the sautéed vegetables and herbs on top.
- In a separate bowl, whisk together the broth and eggs. Pour this mixture over the bread and vegetables, tossing gently to combine. The bread should be moist but not swimming in liquid. If it feels dry, add a splash more broth.
- Season with salt and pepper to taste. If you’re adding nuts, fold them in now for that extra texture.
- Transfer the stuffing mixture to the prepared baking dish. Cover with foil and bake for 25 minutes.
- Remove the foil and bake for an additional 15 minutes, or until the top is golden and crisp. This finishing touch gives you that irresistible crunchy top layer that I always look forward to.
- Let the stuffing rest for 5 minutes before serving. This helps it set and makes serving cleaner and easier.
One tip I’ve learned from many family dinners: don’t rush the toasting step. It might seem small, but it really is the secret to great texture. My son Eli, who can be a picky eater, always digs into the crispy edges first, so I make sure they’re just right!
- Prep Time: 15 minutes
- Cook Time: 30 minutes
- Category: Main Dish
- Method: Cooking
- Cuisine: International
Keywords: Garlic Herb Stuffing, recipe, cooking, food
Steps to Create Your Garlic Herb Stuffing
- Preheat your oven to 350°F (175°C). Lightly grease a 9×13-inch baking dish and set it aside.
- Spread the bread cubes on a baking sheet and toast them in the oven for about 10-15 minutes until they’re dry and just starting to crisp at the edges. This step helps the bread soak up the broth without becoming soggy.
- While the bread toasts, melt the butter in a large skillet over medium heat. Add the chopped onion and celery and cook until softened, about 5-7 minutes. You want the veggies tender but not browned.
- Add the minced garlic and cook for another 1-2 minutes until fragrant. Stir in the fresh herbs—sage, thyme, and parsley—and cook for 30 seconds to release their aroma.
- Transfer the toasted bread cubes to a large mixing bowl. Pour the sautéed vegetables and herbs on top.
- In a separate bowl, whisk together the broth and eggs. Pour this mixture over the bread and vegetables, tossing gently to combine. The bread should be moist but not swimming in liquid. If it feels dry, add a splash more broth.
- Season with salt and pepper to taste. If you’re adding nuts, fold them in now for that extra texture.
- Transfer the stuffing mixture to the prepared baking dish. Cover with foil and bake for 25 minutes.
- Remove the foil and bake for an additional 15 minutes, or until the top is golden and crisp. This finishing touch gives you that irresistible crunchy top layer that I always look forward to.
- Let the stuffing rest for 5 minutes before serving. This helps it set and makes serving cleaner and easier.
One tip I’ve learned from many family dinners: don’t rush the toasting step. It might seem small, but it really is the secret to great texture. My son Eli, who can be a picky eater, always digs into the crispy edges first, so I make sure they’re just right! Learn more: Fall in Love with the Irresistible Marry Me Shrimps Recipe
Tips for Making the Best Garlic Herb Stuffing
From my years of stretching simple ingredients into mouthwatering meals, a few tips stand out to make your Garlic Herb Stuffing shine:
- Use day-old bread: Fresh bread tends to get mushy. Letting it dry out overnight or toasting it ensures it soaks up the flavors without falling apart.
- Don’t skip the herbs: The combination of sage, thyme, and parsley brings the stuffing to life. Feel free to adjust based on what you have—rosemary or marjoram are great alternatives.
- Control moisture carefully: Add broth gradually. You want the bread moist, not soggy—this takes some feel, but it gets easier with practice.
- Butter is your friend: It adds richness and helps soften the veggies while keeping the stuffing luscious.
- Customize with extras: For a bit of crunch and flavor, toss in toasted nuts or dried cranberries. My family loves the sweet bursts alongside the savory herbs.
- Make ahead: You can assemble your stuffing a day in advance, cover it tightly, and bake it just before dinner—perfect for busy nights.
Serving Suggestions and Pairings

In my home, Garlic Herb Stuffing is the unsung hero that brings the rest of the meal together. I often serve it alongside roast chicken or a simple pan-seared pork chop for a comforting weeknight dinner. It also shines at holiday feasts with turkey or ham, making it a versatile side for any occasion.
For a fresh contrast, I like to add a crisp green salad with a tangy vinaigrette or some roasted seasonal vegetables. The softness and savory depth of the stuffing balance beautifully against bright, crunchy sides. And if you’re aiming for a vegetarian meal, pair it with a hearty mushroom gravy or a savory vegetable stew.
My son Eli once surprised me by requesting extra stuffing instead of dessert—which, coming from a kid known for bargaining at the table, is a huge compliment. That’s when I knew this recipe had truly earned its place in the family rotation.
Storage and Reheating Tips
Leftover Garlic Herb Stuffing is a blessing in disguise. Here’s how to keep it tasting fresh:
- Cool completely: Before storing, let the stuffing cool to room temperature to prevent condensation and sogginess.
- Refrigerate: Store leftovers in an airtight container for up to 4 days.
- Freeze: For longer storage, freeze in a freezer-safe container for up to 3 months. Thaw overnight in the fridge before reheating.
- Reheat: Warm leftovers in a 350°F oven for 15-20 minutes, covered with foil to prevent drying out. Remove the foil in the last 5 minutes to crisp up the top again.
When I’m pressed for time, I’ve even reheated stuffing in the microwave covered with a damp paper towel, though the oven method keeps that delightful texture intact. Planning ahead with make-ahead and freeze-friendly options has saved me many rushed dinners, especially when Maya and I are juggling work and caring for Eli.
Frequently Asked Questions
What are the main ingredients for Garlic Herb Stuffing?
The main ingredients for Garlic Herb Stuffing include the items listed in our ingredients section above. Each ingredient plays a crucial role in achieving the perfect flavor and texture.
How long does it take to make Garlic Herb Stuffing?
The total time to make Garlic Herb Stuffing includes both preparation and cooking time. Check the recipe card above for exact timing details.
Can I make Garlic Herb Stuffing ahead of time?
Yes, Garlic Herb Stuffing can often be prepared in advance. Store it properly in an airtight container in the refrigerator and consume within the recommended timeframe.
What can I serve with Garlic Herb Stuffing?
Garlic Herb Stuffing pairs well with various sides and accompaniments. Consider the serving suggestions mentioned in the recipe for the best dining experience.
Is Garlic Herb Stuffing suitable for special diets?
Depending on the ingredients used, Garlic Herb Stuffing may be adapted for various dietary needs. Check the ingredients list and consider substitutions as needed for your dietary requirements.
Final Thoughts
Cooking has always been my way of connecting with family, stretching simple ingredients, and crafting meals that bring comfort and joy. This Garlic Herb Stuffing embodies all those values—easy to make, adaptable, and full of flavor that feels like home. Whether you’re feeding a crowd or simply want a satisfying side that complements any meal, this recipe will become a reliable favorite.
Remember, cooking is about experimenting and enjoying the process. If my twelve-year-old self could fix an oversalted chili by playing with flavors, you can definitely master this Garlic Herb Stuffing. You’ve got this!
So next time you’re looking to add a warm, herbaceous touch to your dinner, give this recipe a try. I’m confident it’ll bring a little extra love to your table, just like it has to mine.