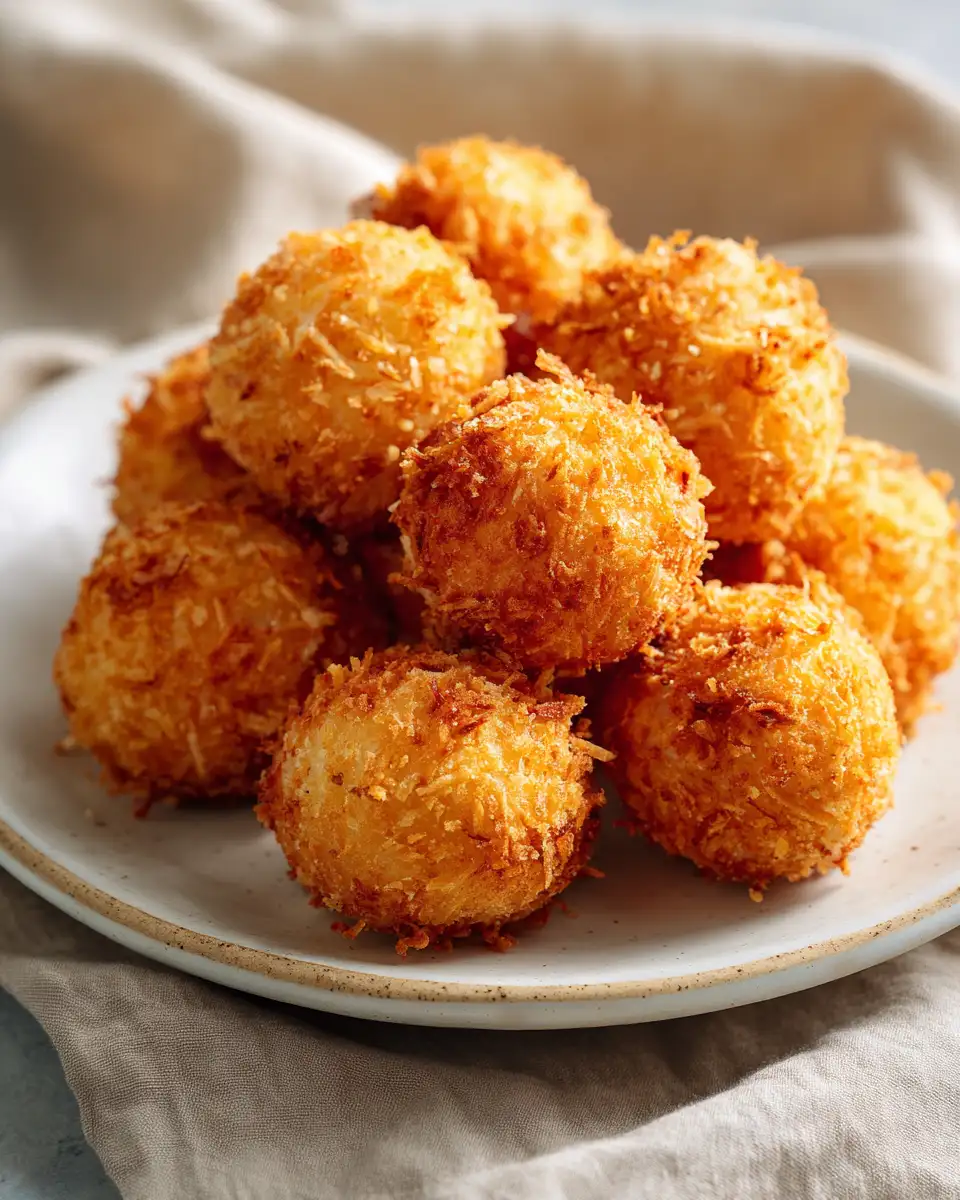
There’s something undeniably comforting about crispy fried potato balls—those golden, crunchy spheres hiding a fluffy, tender center that just melts in your mouth. Growing up in a small coastal town, my family often gathered around the table with simple, hearty dishes that stretched pantry staples in the most satisfying ways. These crispy fried potato balls remind me of those moments, where a humble potato transformed into a crowd-pleasing snack or side that brought everyone closer. I still remember the first time I tried to salvage an oversalted chili by turning to beans and tomatoes, and that same spirit of problem-solving and flavor balance guides me when I make these potato balls today. Whether you’re a seasoned home cook or just starting out, I promise this recipe is approachable, rewarding, and sure to become a family favorite.
Table of Contents
Why You’ll Love This Crispy Fried Potato Balls
What makes these crispy fried potato balls stand out isn’t just their irresistible crunch but the way they bring together simplicity and satisfaction in every bite. From my years of hosting budget-friendly dinners in college to cooking for my own little family now, I’ve learned that the best recipes are those that don’t just taste good but are doable on a weeknight after a busy day. These potato balls tick all those boxes.
First, they use basic ingredients you probably already have in your kitchen: potatoes, cheese, herbs, and a few pantry staples. The technique is straightforward, avoiding any complicated steps that might intimidate home cooks. Plus, they fry up quickly, making them perfect for a quick appetizer or a side with dinner. I love how they’re versatile, too—perfect for dipping, snacking, or even packing into lunchboxes.
Most importantly, these potato balls remind me of those family dinners where food was more than fuel; it was a way to connect. When my son Eli tried these for the first time, the fact that he ate them without bargaining was a huge win. If something passes the “Eli test,” it’s earned a spot on our table and in my recipe collection.
Ingredients You’ll Need for This Crispy Fried Potato Balls
- 3 large russet potatoes (about 2 pounds), peeled and cut into chunks
- 1 cup shredded sharp cheddar cheese (or mozzarella for a milder taste)
- 1/2 cup all-purpose flour (plus extra for dusting)
- 2 large eggs, beaten
- 1/2 cup plain breadcrumbs (panko works well for extra crispiness)
- 2 cloves garlic, minced
- 1/4 cup chopped fresh parsley (optional, for brightness)
- 1 teaspoon salt
- 1/2 teaspoon black pepper
- Vegetable oil or canola oil, for frying (about 2 cups)
Substitution tips: If you don’t have fresh parsley, dried Italian seasoning works in a pinch. For a gluten-free version, swap the all-purpose flour and breadcrumbs with gluten-free alternatives. You can also experiment with cheese—Gruyère or pepper jack add a nice twist.
Nutrition Facts
- Calories: Approximately 180 per 3 potato balls
- Protein: 6g
- Fat: 8g (mostly from frying oil and cheese)
- Carbohydrates: 22g
- Fiber: 2g
- Sugar: 1g
- Sodium: 350mg
Keep in mind, these values can vary depending on the size of your potato balls and the type of cheese or oil you use. I always recommend using a moderate amount of oil for frying and draining the potato balls well on paper towels to keep them lighter. Learn more: Crispy Parmesan Roasted Broccoli Recipe You Need to Try
Print
Irresistibly Crispy Fried Potato Balls You Have to Try
- Total Time: 45 minutes
- Yield: 4 servings 1x
Description
Learn how to make delicious Crispy Fried Potato Balls. Easy recipe with step-by-step instructions.
Ingredients
- 3 large russet potatoes (about 2 pounds), peeled and cut into chunks
- 1 cup shredded sharp cheddar cheese (or mozzarella for a milder taste)
- 1/2 cup all-purpose flour (plus extra for dusting)
- 2 large eggs, beaten
- 1/2 cup plain breadcrumbs (panko works well for extra crispiness)
- 2 cloves garlic, minced
- 1/4 cup chopped fresh parsley (optional, for brightness)
- 1 teaspoon salt
- 1/2 teaspoon black pepper
- Vegetable oil or canola oil, for frying (about 2 cups)
Substitution tips: If you don’t have fresh parsley, dried Italian seasoning works in a pinch. For a gluten-free version, swap the all-purpose flour and breadcrumbs with gluten-free alternatives. You can also experiment with cheese—Gruyère or pepper jack add a nice twist.
Instructions
- Start by boiling the peeled and chopped potatoes in salted water for about 15-20 minutes until they’re fork-tender. Drain well and return them to the pot.
- Mash the potatoes thoroughly until smooth, making sure there are no lumps. This is key for that tender inside texture. I like to mash them with a potato masher, but a fork works too.
- Add the minced garlic, chopped parsley, salt, and pepper to the mashed potatoes. Stir in the shredded cheese while the potatoes are still warm so it melts nicely.
- Let the potato mixture cool a bit, then scoop out about 2 tablespoons at a time and roll into balls. If the mixture feels too sticky, dust your hands with a little flour.
- Set up a breading station with three shallow bowls: one with flour, one with beaten eggs, and one with breadcrumbs.
- Roll each potato ball first in flour, then dip into the egg, and finally coat evenly with breadcrumbs. This triple layer creates that irresistible crispy crust.
- Heat about 2 inches of oil in a deep pan or skillet to 350°F (175°C). Use a kitchen thermometer for accuracy—this step makes all the difference in achieving a perfect crunch without greasiness.
- Carefully fry the potato balls in batches, about 3-4 at a time, so the oil temperature stays steady. Fry for 3-4 minutes, turning occasionally until they’re golden brown and crispy all over.
- Use a slotted spoon to transfer the fried potato balls to a plate lined with paper towels to drain excess oil.
- Serve warm with your favorite dipping sauce or as a side dish. Trust me, these won’t last long!
One thing I learned from years of cooking for friends and family is the importance of patience during frying. Rushing or overcrowding the pan results in soggy balls, not crispy ones. I remember one Wednesday dinner where I was so eager to serve, I threw too many in the pan—and let’s just say it was a crunchy lesson!
- Prep Time: 15 minutes
- Cook Time: 30 minutes
- Category: Main Dish
- Method: Cooking
- Cuisine: International
Keywords: Crispy Fried Potato Balls, recipe, cooking, food
Steps to Create Your Crispy Fried Potato Balls
- Start by boiling the peeled and chopped potatoes in salted water for about 15-20 minutes until they’re fork-tender. Drain well and return them to the pot.
- Mash the potatoes thoroughly until smooth, making sure there are no lumps. This is key for that tender inside texture. I like to mash them with a potato masher, but a fork works too.
- Add the minced garlic, chopped parsley, salt, and pepper to the mashed potatoes. Stir in the shredded cheese while the potatoes are still warm so it melts nicely.
- Let the potato mixture cool a bit, then scoop out about 2 tablespoons at a time and roll into balls. If the mixture feels too sticky, dust your hands with a little flour.
- Set up a breading station with three shallow bowls: one with flour, one with beaten eggs, and one with breadcrumbs.
- Roll each potato ball first in flour, then dip into the egg, and finally coat evenly with breadcrumbs. This triple layer creates that irresistible crispy crust.
- Heat about 2 inches of oil in a deep pan or skillet to 350°F (175°C). Use a kitchen thermometer for accuracy—this step makes all the difference in achieving a perfect crunch without greasiness.
- Carefully fry the potato balls in batches, about 3-4 at a time, so the oil temperature stays steady. Fry for 3-4 minutes, turning occasionally until they’re golden brown and crispy all over.
- Use a slotted spoon to transfer the fried potato balls to a plate lined with paper towels to drain excess oil.
- Serve warm with your favorite dipping sauce or as a side dish. Trust me, these won’t last long!
One thing I learned from years of cooking for friends and family is the importance of patience during frying. Rushing or overcrowding the pan results in soggy balls, not crispy ones. I remember one Wednesday dinner where I was so eager to serve, I threw too many in the pan—and let’s just say it was a crunchy lesson!
Tips for Making the Best Crispy Fried Potato Balls
- Use starchy potatoes: Russets are ideal because they mash smoothly and hold together well.
- Don’t skip the cooling step: Letting the potato mixture cool slightly makes shaping easier and prevents the cheese from melting too fast.
- Maintain oil temperature: Monitor your oil with a thermometer to keep it around 350°F. If it’s too hot, the outside burns before the inside cooks; too low, and the balls absorb oil and get greasy.
- Double breading for crunch: The flour-egg-breadcrumb combo is classic, but for an extra-crispy coating, you can repeat the egg and breadcrumb step once more.
- Drain well: Always transfer fried balls to paper towels to soak up excess oil, keeping them crisp and light.
- Make ahead: You can shape the balls and refrigerate them for a few hours before frying. Just keep them covered to prevent drying out.
“I’ve found that the secret to a great crispy fried potato ball is all in the balance—between the fluffy interior and the crunchy exterior—much like that first chili mishap taught me about flavor and texture harmony.”
Serving Suggestions and Pairings
One of my favorite things about crispy fried potato balls is their versatility. They pair wonderfully with a variety of sauces and dishes depending on the mood or occasion. When I’m making these for Eli and Maya, we usually keep it simple with a classic marinara or a garlicky aioli. For a family dinner, they make a fantastic side alongside grilled chicken or a fresh salad.
Here are a few ideas to try:
- Serve with a tangy sour cream and chive dip for a cool contrast.
- Pair with spicy sriracha mayo for a little kick.
- Use as a fun appetizer with a trio of dips: honey mustard, ranch, and chipotle sauce.
- Turn them into a main course by adding crispy fried potato balls to a bowl of chili or tomato stew, a nod to how I first learned to tweak flavors under pressure.
Storage and Reheating Tips
Like many home cooks, I often make extras to save time later in the week. These crispy fried potato balls store well and reheat beautifully if you follow a few simple steps.
- Refrigeration: Store cooled potato balls in an airtight container in the fridge for up to 3 days.
- Freezing: Freeze uncooked, breaded potato balls on a baking sheet in a single layer until firm, then transfer to a freezer-safe bag. They keep well for up to 2 months.
- Reheating: For best texture, reheat in a preheated oven at 375°F (190°C) on a wire rack for 10-12 minutes. Avoid microwaving as it softens the crust.
- Re-frying: You can also refry frozen balls directly from the freezer for a crispy finish in about 4-5 minutes at 350°F.
These storage tips come from many nights when I prepped meals in advance to make weeknight dinners less stressful—a little planning goes a long way in keeping family meals enjoyable and manageable.
Frequently Asked Questions
What are the main ingredients for Crispy Fried Potato Balls?
The main ingredients for Crispy Fried Potato Balls include the items listed in our ingredients section above. Each ingredient plays a crucial role in achieving the perfect flavor and texture.
How long does it take to make Crispy Fried Potato Balls?
The total time to make Crispy Fried Potato Balls includes both preparation and cooking time. Check the recipe card above for exact timing details.
Can I make Crispy Fried Potato Balls ahead of time?
Yes, Crispy Fried Potato Balls can often be prepared in advance. Store it properly in an airtight container in the refrigerator and consume within the recommended timeframe.
What can I serve with Crispy Fried Potato Balls?
Crispy Fried Potato Balls pairs well with various sides and accompaniments. Consider the serving suggestions mentioned in the recipe for the best dining experience.
Is Crispy Fried Potato Balls suitable for special diets?
Depending on the ingredients used, Crispy Fried Potato Balls may be adapted for various dietary needs. Check the ingredients list and consider substitutions as needed for your dietary requirements.
Final Thoughts
Cooking is, for me, always about more than just the food. It’s about those shared moments around the table, the stories passed down, and the little experiments that turn mistakes into discoveries. Crispy fried potato balls embody all of that—they’re simple, comforting, and full of heart. Whether you’re feeding a hungry crowd or just looking for a satisfying snack to share with loved ones, this recipe is a reliable go-to that brings warmth and crunch to any occasion.
Remember, the best results come from cooking with patience and a willingness to learn—just like the time I fixed that salty chili by playing around with beans and tomatoes. You’ve got this. So grab your potatoes, heat up that oil, and get ready to make some crispy fried potato balls that might just become your new favorite comfort food.
