Description
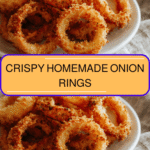
Learn how to make delicious CRISPY HOMEMADE ONION RINGS. Easy recipe with step-by-step instructions.
Ingredients
Scale
- 2 large sweet onions (Vidalia or Walla Walla work great)
- 1 ½ cups all-purpose flour
- 1 teaspoon baking powder
- 1 teaspoon salt, plus extra for seasoning
- 1 teaspoon smoked paprika (optional, but adds nice depth)
- 1 cup buttermilk (or 1 cup milk + 1 tablespoon lemon juice, let sit 5 minutes)
- 1 large egg
- 1 ½ cups panko breadcrumbs (for extra crunch) or regular breadcrumbs
- Vegetable oil or canola oil, for frying (about 2-3 cups depending on your pan size)
Substitution tips: If you don’t have buttermilk, the milk and lemon juice combo works just as well and was a trick my mom used when we were tight on ingredients. For gluten-free options, swap the flour and breadcrumbs with your favorite gluten-free blends—just check that they’re suitable for frying.
Instructions
- Start by peeling your onions and slicing them into ¼ to ½ inch thick rings. Separate the rings gently to keep them intact. I’ve found that thicker rings tend to hold up better during frying, especially when cooking for a crowd.
- In a shallow bowl, whisk together the flour, baking powder, salt, and smoked paprika. This seasoned flour mix will give your onion rings that signature flavorful crust.
- In another bowl, combine the buttermilk and egg until smooth. This mixture helps the flour and breadcrumbs stick perfectly to the onions.
- Place the panko breadcrumbs in a third bowl. Panko adds a wonderful extra crunch, something I started using after Eli declared regular breadcrumbs “too mushy.”
- Dip each onion ring first into the flour mixture, making sure it’s fully coated. Then dunk it into the buttermilk and egg mixture, followed by a final coat of breadcrumbs. For an extra crispy layer, you can double-dip by repeating the wet and breadcrumb step. This is a little trick I picked up from my evening culinary classes and have made my own since.
- Heat your oil in a deep skillet or Dutch oven to 350°F (use a thermometer if you have one). If you don’t have a thermometer, drop a small bit of batter in the oil—if it sizzles and rises to the surface quickly, you’re good to go.
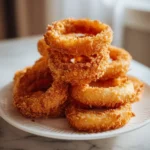
- Carefully fry the onion rings in batches, making sure not to overcrowd the pan. Fry each batch for about 2-3 minutes, flipping halfway through, until they turn golden brown and crispy. I like to keep a plate lined with paper towels nearby to drain any excess oil.
- Once fried, sprinkle the onion rings with a pinch of salt right away to enhance their flavor. This step reminds me of my parents’ kitchen, where a little finishing salt made all the difference.
- Serve immediately for the best crunch, or keep warm in a low oven (200°F) on a wire rack while you finish frying the rest.
- Prep Time: 15 minutes
- Cook Time: 30 minutes
- Category: Main Dish
- Method: Cooking
- Cuisine: International
Keywords: CRISPY HOMEMADE ONION RINGS, recipe, cooking, food