There’s something about pumpkin pie bars that instantly brings me back to those cozy family dinners in my small coastal hometown—where food wasn’t just about filling plates, but about creating moments of connection. Over the years, I’ve learned that these bars are the perfect blend of comfort and convenience, a sweet treat that’s as approachable for a weeknight dessert as it is for holiday celebrations. Like the first time I tried rescuing an oversalted chili by balancing flavors, mastering pumpkin pie bars is about understanding simplicity and balance. Today, I’m excited to share a recipe that’s become a staple in my home, tested and loved by my partner Maya and our son Eli, who surprisingly hasn’t bargained for seconds on these bars yet!
Table of Contents
Why You’ll Love This Pumpkin Pie Bars
Pumpkin pie bars deliver all the warm, spiced goodness of traditional pumpkin pie but with less fuss and a fun, handheld twist. Growing up, my parents taught me that the best meals came from stretching pantry staples into something comforting and satisfying. This recipe follows that philosophy—it turns simple ingredients like pumpkin puree, eggs, and pantry spices into a dessert that feels special without requiring hours in the kitchen.
I love these bars because they’re forgiving, budget-friendly, and perfect for sharing. Whether you’re making an affordable weeknight dessert or prepping for a festive gathering, they hold up well through transport and storage. Plus, my experience hosting college “Wednesday dinners” taught me the value of recipes that don’t just taste good but also keep well for leftovers—these bars check that box.
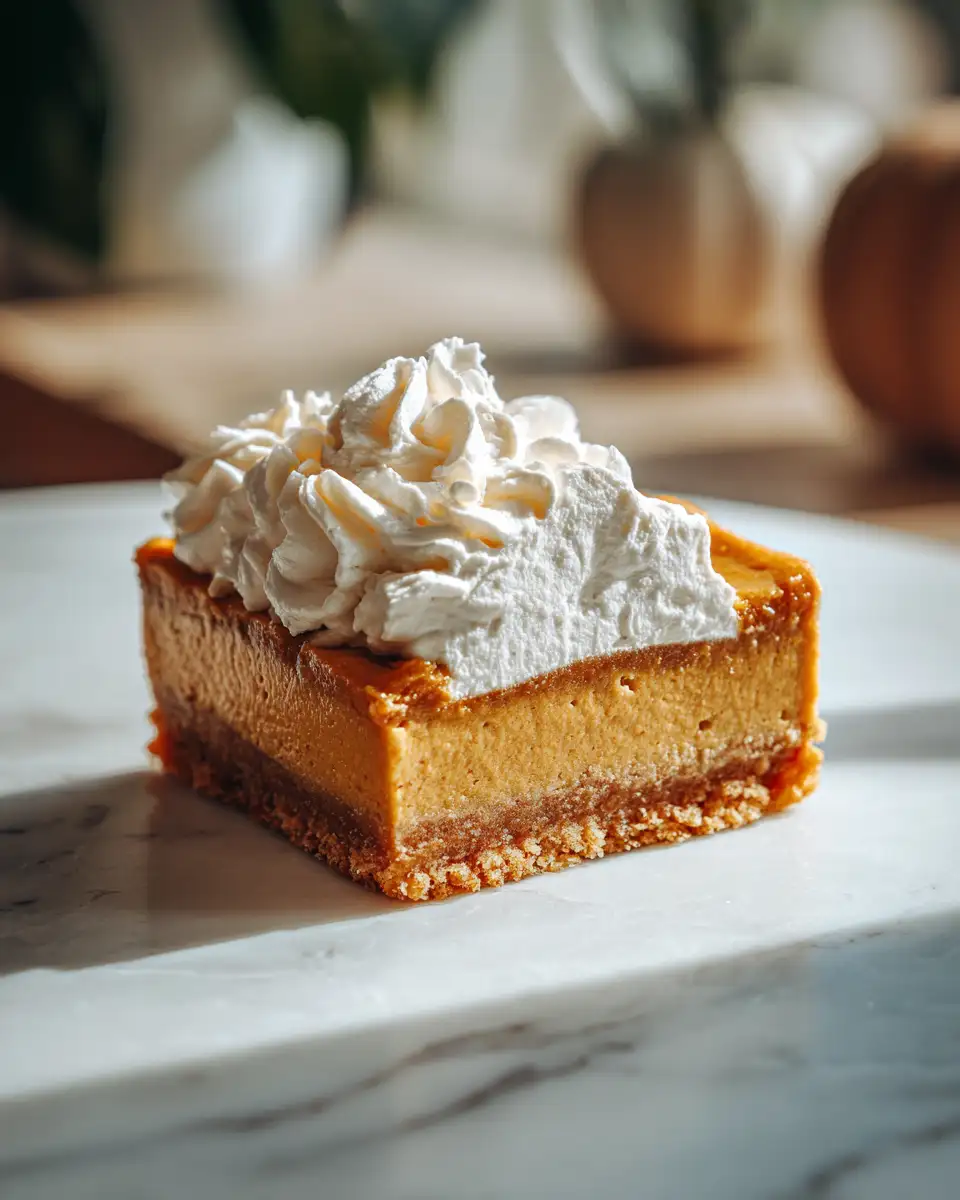
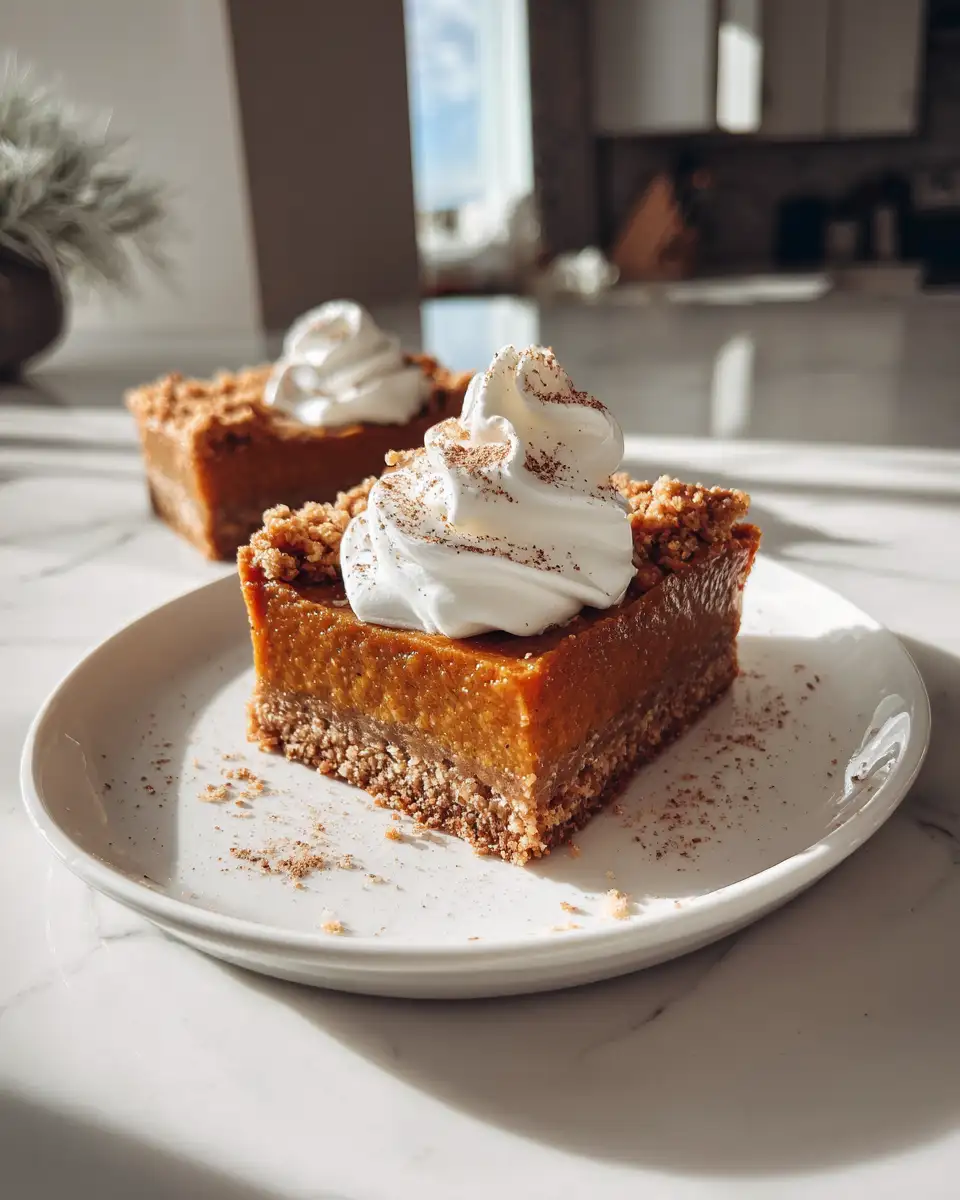
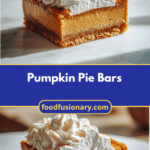
And if you’re like me, always balancing flavor and texture, you’ll appreciate how the buttery crust contrasts with the smooth, spiced pumpkin filling. It’s a crowd-pleaser that invites you to slow down, savor, and enjoy the simple pleasures of homemade baking.
Ingredients You’ll Need for This Pumpkin Pie Bars
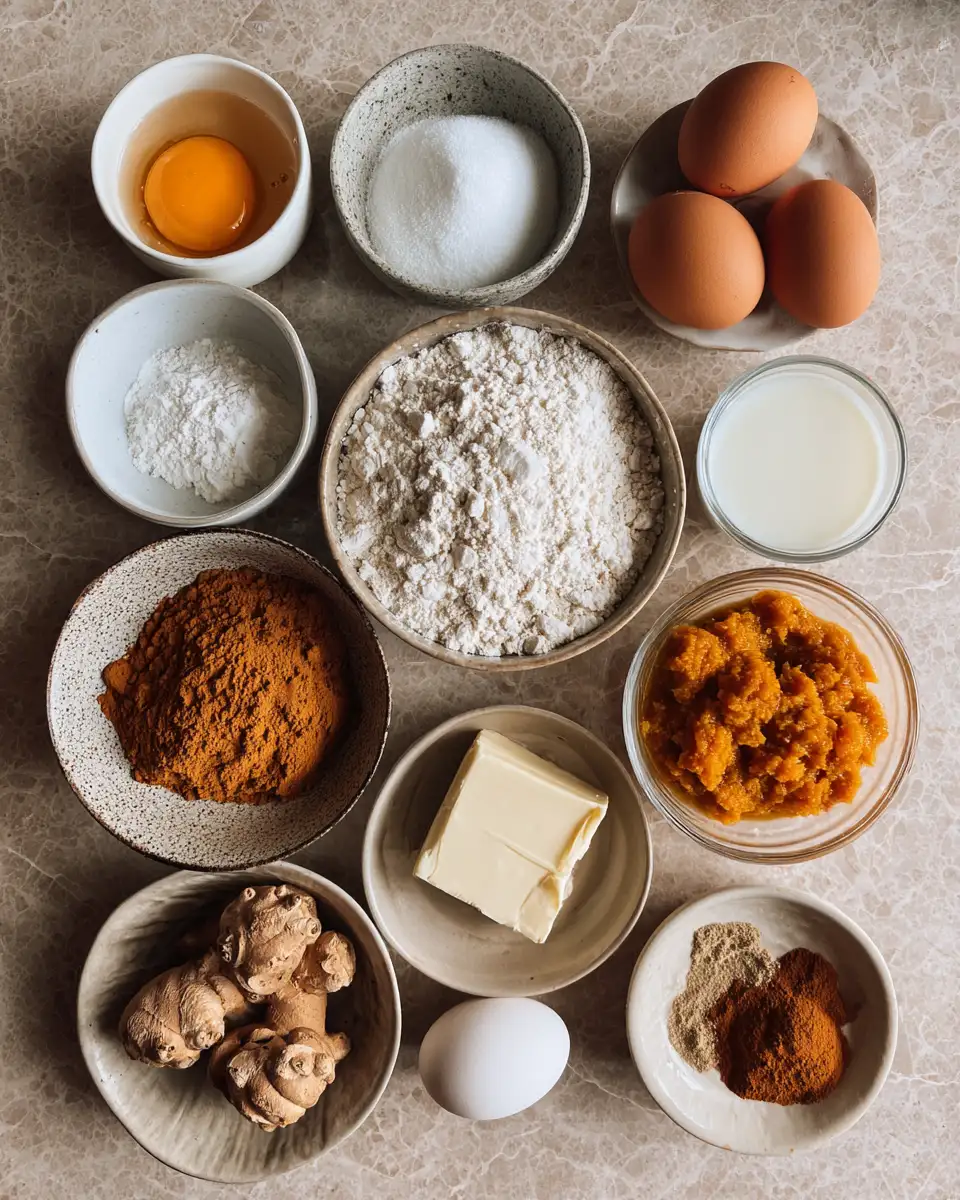
- 1 1/2 cups all-purpose flour (or whole wheat pastry flour for a nuttier flavor)
- 1/2 cup granulated sugar
- 1/4 teaspoon salt
- 1/2 cup unsalted butter, cold and cubed
- 1 large egg, lightly beaten
- 1 cup pumpkin puree (canned or homemade)
- 2 large eggs
- 3/4 cup brown sugar, packed
- 1/2 cup evaporated milk or whole milk (for creaminess)
- 2 teaspoons pumpkin pie spice (or 1 teaspoon cinnamon plus 1/2 teaspoon each nutmeg and ginger)
- 1 teaspoon vanilla extract
- Optional: 1/4 teaspoon ground cloves for extra warmth
If you need to make substitutions, feel free to swap the brown sugar for coconut sugar or maple sugar to add a richer depth. For a dairy-free version, use a plant-based butter and coconut or almond milk instead of evaporated milk. These swaps won’t compromise the comforting spice and texture that make pumpkin pie bars so special.
Nutrition Facts
- Calories: Approximately 220 per serving (based on 12 bars)
- Protein: 3g
- Fat: 11g (mostly from butter)
- Carbohydrates: 28g
- Fiber: 2g
- Sugar: 16g
- Sodium: 120mg
These bars strike a nice balance between indulgence and nutrition, especially when you consider that pumpkin puree is loaded with vitamins A and C, plus fiber. I appreciate recipes like this that don’t just taste great but also bring some wholesome elements to the table—something I’ve always valued since those early family dinners where every ingredient had a role to play.
Print
Irresistible Pumpkin Pie Bars That Will Steal the Show This Fall
- Total Time: 45 minutes
- Yield: 4 servings 1x
Description
Learn how to make delicious Pumpkin Pie Bars. Easy recipe with step-by-step instructions.
Ingredients
- 1 1/2 cups all-purpose flour (or whole wheat pastry flour for a nuttier flavor)
- 1/2 cup granulated sugar
- 1/4 teaspoon salt
- 1/2 cup unsalted butter, cold and cubed
- 1 large egg, lightly beaten
- 1 cup pumpkin puree (canned or homemade)
- 2 large eggs
- 3/4 cup brown sugar, packed
- 1/2 cup evaporated milk or whole milk (for creaminess)
- 2 teaspoons pumpkin pie spice (or 1 teaspoon cinnamon plus 1/2 teaspoon each nutmeg and ginger)
- 1 teaspoon vanilla extract
- Optional: 1/4 teaspoon ground cloves for extra warmth
If you need to make substitutions, feel free to swap the brown sugar for coconut sugar or maple sugar to add a richer depth. For a dairy-free version, use a plant-based butter and coconut or almond milk instead of evaporated milk. These swaps won’t compromise the comforting spice and texture that make pumpkin pie bars so special.
Instructions
- Preheat your oven to 350°F (175°C). Line a 9×13-inch baking pan with parchment paper, leaving an overhang on the sides to easily lift the bars out later.
- In a medium bowl, combine the flour, granulated sugar, and salt. Add the cold, cubed butter and use a pastry cutter or your fingers to work the butter into the dry ingredients until the mixture resembles coarse crumbs—about the size of small peas. This step reminds me of the first time I tried making pie crust and learned that cold butter is key to that perfect flaky texture.
- Press about two-thirds of the crust mixture evenly into the bottom of the prepared pan, creating a firm, even layer. Bake this crust for 12-15 minutes until it’s lightly golden around the edges. This pre-baking ensures a sturdy base that won’t get soggy under the filling.
- While the crust bakes, whisk together the pumpkin puree, eggs, brown sugar, evaporated milk, pumpkin pie spice, vanilla extract, and optional cloves in a large bowl until smooth and creamy. This filling is where the magic happens—getting the right spice balance here is like fine-tuning a melody in a family recipe.
- Once the crust is pre-baked and slightly cooled, pour the pumpkin filling evenly over it. Use a spatula to gently spread it out, making sure to reach all corners.
- Bake the assembled bars for 35-40 minutes. You’ll know they’re done when the edges are set and the center still has a slight jiggle—like a traditional pumpkin pie, it will firm up as it cools.
- Remove from the oven and let cool completely in the pan on a wire rack. For best results, chill the bars in the refrigerator for at least 2 hours before cutting. This step makes slicing neater and helps the flavors meld, much like letting a stew sit overnight.
- Using the parchment overhang, carefully lift the bars out of the pan and transfer to a cutting board. Slice into 12 equal squares and enjoy!
From my experience, patience is key here—rushing to cut these bars before they’ve set can cause a mess, something I learned early on during my college dinner parties. It’s worth the wait, and trust me, the payoff is a dessert that holds together beautifully.
- Prep Time: 15 minutes
- Cook Time: 30 minutes
- Category: Main Dish
- Method: Cooking
- Cuisine: International
Keywords: Pumpkin Pie Bars, recipe, cooking, food
Steps to Create Your Pumpkin Pie Bars
- Preheat your oven to 350°F (175°C). Line a 9×13-inch baking pan with parchment paper, leaving an overhang on the sides to easily lift the bars out later.
- In a medium bowl, combine the flour, granulated sugar, and salt. Add the cold, cubed butter and use a pastry cutter or your fingers to work the butter into the dry ingredients until the mixture resembles coarse crumbs—about the size of small peas. This step reminds me of the first time I tried making pie crust and learned that cold butter is key to that perfect flaky texture.
- Press about two-thirds of the crust mixture evenly into the bottom of the prepared pan, creating a firm, even layer. Bake this crust for 12-15 minutes until it’s lightly golden around the edges. This pre-baking ensures a sturdy base that won’t get soggy under the filling.
- While the crust bakes, whisk together the pumpkin puree, eggs, brown sugar, evaporated milk, pumpkin pie spice, vanilla extract, and optional cloves in a large bowl until smooth and creamy. This filling is where the magic happens—getting the right spice balance here is like fine-tuning a melody in a family recipe.
- Once the crust is pre-baked and slightly cooled, pour the pumpkin filling evenly over it. Use a spatula to gently spread it out, making sure to reach all corners.
- Bake the assembled bars for 35-40 minutes. You’ll know they’re done when the edges are set and the center still has a slight jiggle—like a traditional pumpkin pie, it will firm up as it cools.
- Remove from the oven and let cool completely in the pan on a wire rack. For best results, chill the bars in the refrigerator for at least 2 hours before cutting. This step makes slicing neater and helps the flavors meld, much like letting a stew sit overnight.
- Using the parchment overhang, carefully lift the bars out of the pan and transfer to a cutting board. Slice into 12 equal squares and enjoy!
From my experience, patience is key here—rushing to cut these bars before they’ve set can cause a mess, something I learned early on during my college dinner parties. It’s worth the wait, and trust me, the payoff is a dessert that holds together beautifully.
Tips for Making the Best Pumpkin Pie Bars
Over the years, I’ve picked up a few tricks that take these bars from good to great, and I’m excited to share them with you:
- Use cold butter: This helps create a flaky, tender crust that stands up to the filling.
- Don’t skip the pre-bake: It’s essential for preventing a soggy bottom, especially when the filling is moist.
- Adjust spices to your taste: I like to start with the classic pumpkin pie spice blend but often add a pinch of extra cinnamon or nutmeg based on how the season feels.
- Chill before cutting: Cooling the bars completely and then refrigerating helps them slice cleanly, minimizing crumbs and cracks.
- Make ahead: These bars actually improve in flavor when made a day in advance, making them perfect for busy weeknights or holiday prep.
- Got oversalted filling? Trust me, I’ve been there. If your filling tastes too salty, a squeeze of fresh lemon juice or a touch more sugar can help rebalance flavors, just like I learned fixing that early chili disaster.
Serving Suggestions and Pairings
One of the joys of pumpkin pie bars is their versatility. Whether you’re serving family or guests, here are some ideas to elevate the experience:
- Top with a dollop of freshly whipped cream or a scoop of vanilla ice cream for a classic finish.
- For a cozy twist, drizzle warm caramel sauce over the bars just before serving.
- Sprinkle chopped toasted pecans or walnuts on top for added crunch—something my son Eli surprisingly loves, which always makes me smile.
- Pair with a hot cup of chai tea or coffee for a perfect autumn afternoon treat.
- If you’re feeling adventurous, spread a thin layer of cream cheese frosting over cooled bars for a tangy contrast.
These serving ideas come from years of adapting recipes to fit whatever we had on hand or whatever mood struck, much like those Wednesday dinners in college where creativity met budget constraints.
Storage and Reheating Tips
One of the reasons I keep coming back to pumpkin pie bars is how well they store, making life easier when you’re juggling family dinners and work schedules.
- Refrigerate: Store the bars in an airtight container in the fridge for up to 5 days. This keeps them fresh and flavorful.
- Freeze: Wrap individual bars tightly in plastic wrap and place in a freezer-safe bag or container. Freeze for up to 3 months. Thaw overnight in the fridge before serving.
- Reheat: Warm refrigerated bars in a 300°F oven for 10-15 minutes or microwave briefly. Be careful not to overheat, as the filling can dry out.
These tips come from practical experience—balancing cooking with family life means I need treats that hold up well, just like the ones that never caused a fuss at our dinner table growing up.
Frequently Asked Questions
What are the main ingredients for Pumpkin Pie Bars?
The main ingredients for Pumpkin Pie Bars include the items listed in our ingredients section above. Each ingredient plays a crucial role in achieving the perfect flavor and texture.
How long does it take to make Pumpkin Pie Bars?
The total time to make Pumpkin Pie Bars includes both preparation and cooking time. Check the recipe card above for exact timing details.
Can I make Pumpkin Pie Bars ahead of time?
Yes, Pumpkin Pie Bars can often be prepared in advance. Store it properly in an airtight container in the refrigerator and consume within the recommended timeframe.
What can I serve with Pumpkin Pie Bars?
Pumpkin Pie Bars pairs well with various sides and accompaniments. Consider the serving suggestions mentioned in the recipe for the best dining experience.
Is Pumpkin Pie Bars suitable for special diets?
Depending on the ingredients used, Pumpkin Pie Bars may be adapted for various dietary needs. Check the ingredients list and consider substitutions as needed for your dietary requirements.
Final Thoughts
Pumpkin pie bars are a testament to the power of simple ingredients combined with a little care and patience. They remind me of those early kitchen experiments, like when I salvaged that overly salty chili by leaning into balance and flavor harmony. This recipe is about more than dessert—it’s about creating moments where food brings people closer, whether around a small coastal home table or a busy weeknight dinner with my family.
As a home cook, I’m always looking for reliable recipes that don’t intimidate but invite you to enjoy the process and the result. These pumpkin pie bars are just that: approachable, comforting, and delicious. So gather your ingredients, warm your oven, and remember—you’ve got this. And who knows? Maybe these bars will find a permanent spot at your table, just like they have at mine.