There’s something truly special about Red Velvet Cookie Bars that takes me back to those warm, bustling family dinners from my childhood. Growing up in a small coastal town, we didn’t have fancy gadgets or exotic ingredients, but my parents knew how to turn simple pantry staples into meals that made everyone pause and savor the moment. These bars remind me of those times—comforting, sweet, and just a little bit indulgent. I first experimented with a version of these bars after a “salty chili” mishap that pushed me to play with flavors and textures, and over time, I’ve refined this recipe into a reliable, crowd-pleasing treat that’s perfect for weeknight baking or casual weekend gatherings with Maya and little Eli. Trust me, if Eli gives it the thumbs-up without bargaining, you know it’s a winner.
Table of Contents
Why You’ll Love This Red Velvet Cookie Bars
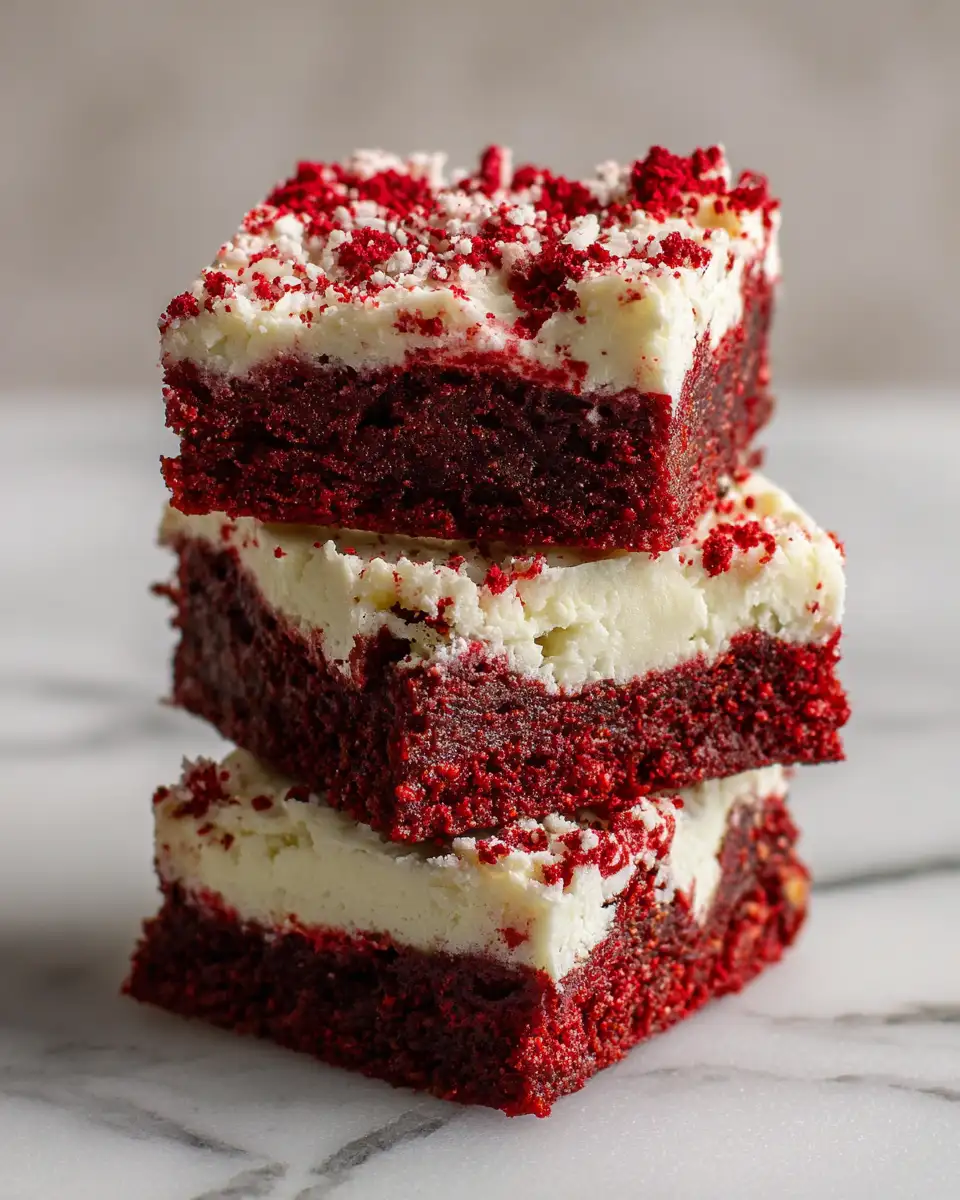
Red Velvet Cookie Bars are the kind of treat that strikes the perfect balance between rich, tender cake and chewy, chocolatey cookie. They’re approachable enough to whip up on a busy weeknight but special enough to serve at a family gathering or potluck. What I love most is how this recipe takes a few pantry staples and transforms them into something that feels festive without being fussy—a nod to my roots where making the most of simple ingredients was a daily art. Plus, these bars feature that classic red velvet tang from a hint of cocoa and vinegar, so every bite has layers of flavor that keep you coming back for more.
Over the years, I’ve learned that the best recipes are those you can trust to deliver consistent results, even when life gets hectic. These bars fit that bill perfectly. Whether you’re a beginner or a seasoned home cook, you’ll find the step-by-step instructions straightforward and the ingredients easy to source. And let me tell you, baking these bars fills your kitchen with a warm, inviting aroma that somehow makes the whole house feel cozier—something I always appreciate when Maya and Eli are around.
Ingredients You’ll Need for This Red Velvet Cookie Bars
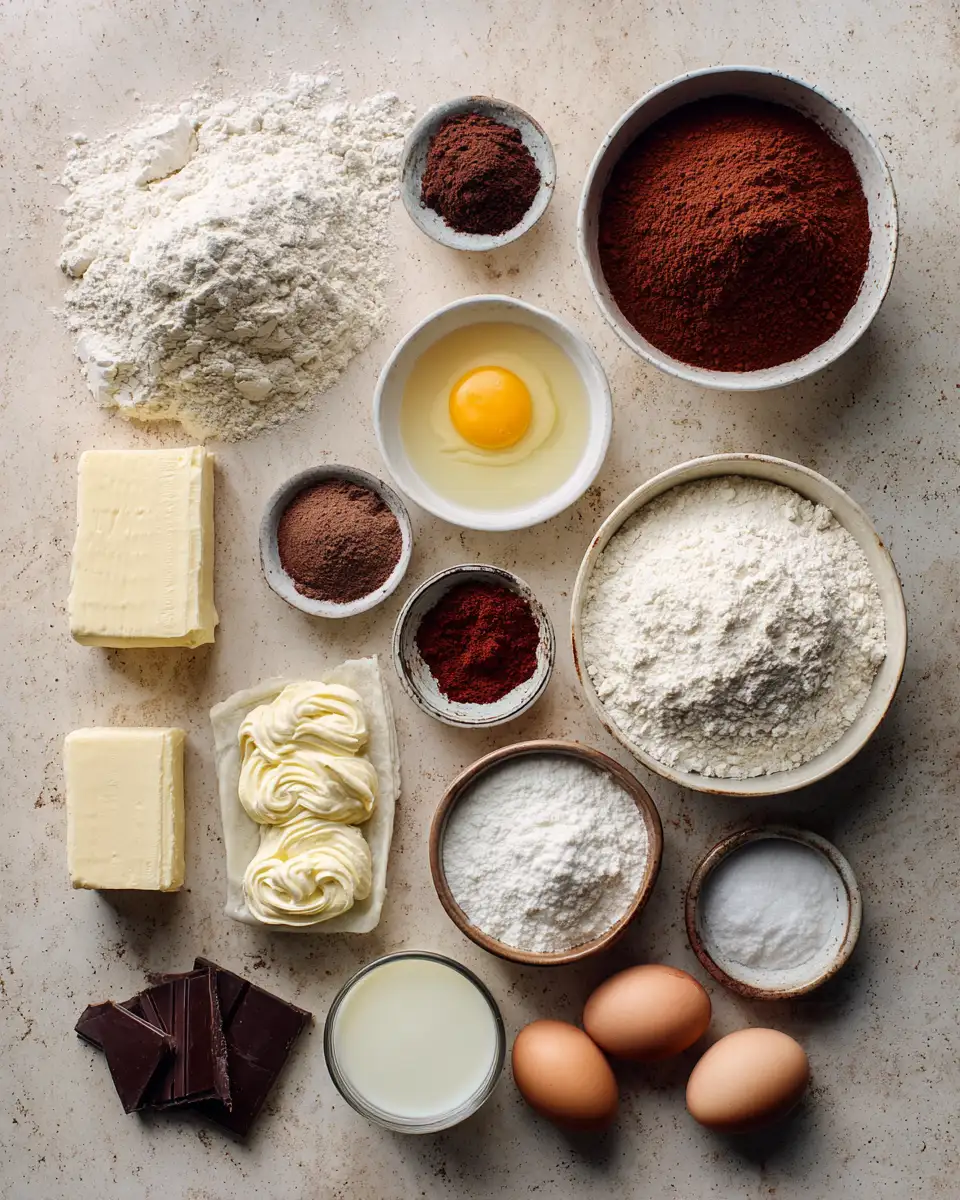
- 2 ½ cups all-purpose flour (can substitute with whole wheat pastry flour for a nuttier flavor)
- 1 tablespoon unsweetened cocoa powder
- 1 teaspoon baking powder
- ½ teaspoon baking soda
- ½ teaspoon salt
- 1 cup unsalted butter, softened (or use coconut oil for a dairy-free option)
- 1 ½ cups granulated sugar
- 2 large eggs, at room temperature
- 1 teaspoon vanilla extract
- 2 tablespoons red food coloring (or use beet juice for a natural alternative)
- 1 teaspoon white vinegar (helps with that classic tang)
- 1 cup cream cheese, softened (for the optional cream cheese swirl)
- ¼ cup powdered sugar (to sweeten the cream cheese swirl)
Nutrition Facts
- Calories: Approximately 280 per serving (based on 16 servings)
- Protein: 3g
- Fat: 15g (with about 9g saturated fat from butter and cream cheese)
- Carbohydrates: 33g
- Fiber: 1g
- Sugar: 20g
- Sodium: 170mg

Irresistible Red Velvet Cookie Bars You Need to Try Today
- Total Time: 45 minutes
- Yield: 4 servings 1x
Description
Learn how to make delicious Red Velvet Cookie Bars. Easy recipe with step-by-step instructions.
Ingredients
- 2 ½ cups all-purpose flour (can substitute with whole wheat pastry flour for a nuttier flavor)
- 1 tablespoon unsweetened cocoa powder
- 1 teaspoon baking powder
- ½ teaspoon baking soda
- ½ teaspoon salt
- 1 cup unsalted butter, softened (or use coconut oil for a dairy-free option)
- 1 ½ cups granulated sugar
- 2 large eggs, at room temperature
- 1 teaspoon vanilla extract
- 2 tablespoons red food coloring (or use beet juice for a natural alternative)
- 1 teaspoon white vinegar (helps with that classic tang)
- 1 cup cream cheese, softened (for the optional cream cheese swirl)
- ¼ cup powdered sugar (to sweeten the cream cheese swirl)
Instructions
- Preheat your oven to 350°F (175°C). Line a 9×13-inch baking pan with parchment paper, making sure to leave some overhang on the sides for easy removal later.
- In a medium bowl, whisk together the flour, cocoa powder, baking powder, baking soda, and salt until evenly combined. This dry mix forms the backbone of your bars, so take a moment to get it well incorporated.
- In a large bowl, use a hand mixer or stand mixer to cream the softened butter and granulated sugar together. Beat on medium speed for about 3-4 minutes until the mixture is light, pale, and fluffy—this step is key for that tender crumb and is something I learned early on when perfecting my weeknight one-pot meals.
- Add the eggs one at a time to the creamed butter and sugar, beating well after each addition. Then stir in the vanilla extract, red food coloring, and white vinegar. The vinegar might seem like a small detail, but it’s what gives the bars their signature tang, a trick I picked up during my culinary class days.
- Gradually add the dry ingredients to the wet, mixing on low speed just until combined. Avoid overmixing here; you want the batter just blended to keep the bars tender.
- If you’re including the cream cheese swirl, beat together the softened cream cheese and powdered sugar in a small bowl until smooth and creamy.
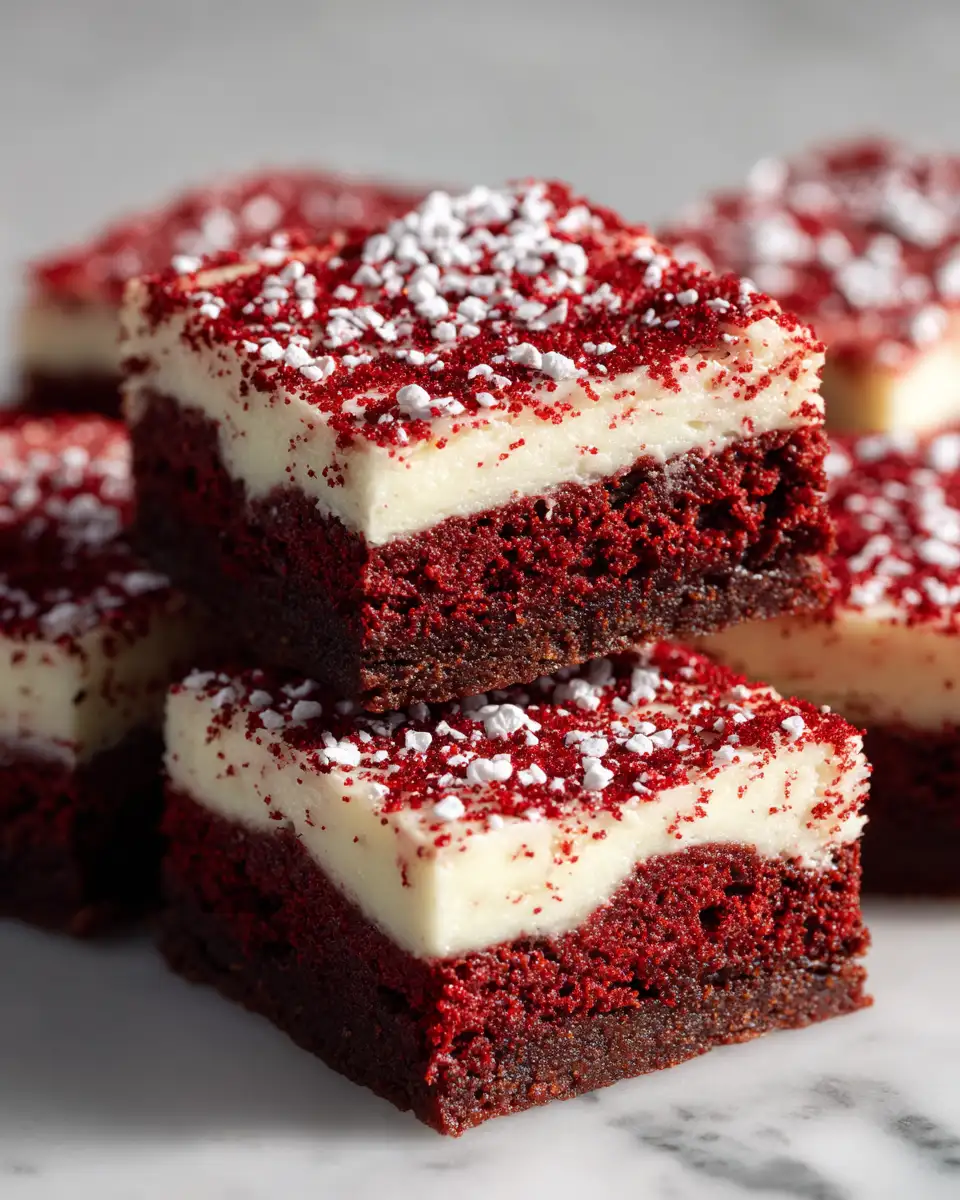
- Pour half of the red velvet batter into the prepared pan and spread it evenly with a spatula. Dollop spoonfuls of the cream cheese mixture over the batter, then gently swirl it with a knife or skewer to create a marbled effect.
- Top with the remaining red velvet batter, spreading evenly to cover the cream cheese swirl.
- Bake in the preheated oven for 30-35 minutes, or until a toothpick inserted into the center comes out with just a few moist crumbs. From experience, don’t overbake—these bars should be soft and slightly gooey in the middle, a texture that my family especially loves.
- Allow the bars to cool completely in the pan on a wire rack before lifting them out using the parchment paper overhang. Cut into squares and serve.
- Prep Time: 15 minutes
- Cook Time: 30 minutes
- Category: Main Dish
- Method: Cooking
- Cuisine: International
Keywords: Red Velvet Cookie Bars, recipe, cooking, food
Steps to Create Your Red Velvet Cookie Bars
- Preheat your oven to 350°F (175°C). Line a 9×13-inch baking pan with parchment paper, making sure to leave some overhang on the sides for easy removal later.
- In a medium bowl, whisk together the flour, cocoa powder, baking powder, baking soda, and salt until evenly combined. This dry mix forms the backbone of your bars, so take a moment to get it well incorporated.
- In a large bowl, use a hand mixer or stand mixer to cream the softened butter and granulated sugar together. Beat on medium speed for about 3-4 minutes until the mixture is light, pale, and fluffy—this step is key for that tender crumb and is something I learned early on when perfecting my weeknight one-pot meals.
- Add the eggs one at a time to the creamed butter and sugar, beating well after each addition. Then stir in the vanilla extract, red food coloring, and white vinegar. The vinegar might seem like a small detail, but it’s what gives the bars their signature tang, a trick I picked up during my culinary class days.
- Gradually add the dry ingredients to the wet, mixing on low speed just until combined. Avoid overmixing here; you want the batter just blended to keep the bars tender.
- If you’re including the cream cheese swirl, beat together the softened cream cheese and powdered sugar in a small bowl until smooth and creamy.
- Pour half of the red velvet batter into the prepared pan and spread it evenly with a spatula. Dollop spoonfuls of the cream cheese mixture over the batter, then gently swirl it with a knife or skewer to create a marbled effect.
- Top with the remaining red velvet batter, spreading evenly to cover the cream cheese swirl.
- Bake in the preheated oven for 30-35 minutes, or until a toothpick inserted into the center comes out with just a few moist crumbs. From experience, don’t overbake—these bars should be soft and slightly gooey in the middle, a texture that my family especially loves.
- Allow the bars to cool completely in the pan on a wire rack before lifting them out using the parchment paper overhang. Cut into squares and serve.
Tips for Making the Best Red Velvet Cookie Bars
One of the first kitchen lessons I learned the hard way was the importance of balance—too much salt or sugar can throw off a whole dish. When making these bars, stick closely to the ingredient amounts, especially the vinegar and cocoa powder, to achieve that classic red velvet flavor. If you’re like me and sometimes have trouble with overly salty dishes (I’m looking at you, chili incident), tasting your batter isn’t an option here, but trust the process!
Another tip: don’t skip the parchment paper lining. It might seem like an extra step, but it makes removing the bars from the pan so much easier and helps preserve those clean edges that look great when serving guests.
For a dairy-free version, swapping butter for coconut oil and cream cheese for a dairy-free spread works surprisingly well. I tested this once when Maya’s parents visited, and everyone still raved about the flavor and texture. Learn more: Irresistible Marshmallow Caramel Crunch Balls Recipe You Need to Try
Finally, if you want to add a little crunch, sprinkle some chopped pecans or walnuts on top before baking. I often do this when Eli’s friends come over because kids love that extra texture, and it adds a nice contrast to the creamy swirl.
Serving Suggestions and Pairings
Red Velvet Cookie Bars are a versatile treat that pairs beautifully with a variety of drinks and accompaniments. When I serve them at home, I like to keep it simple—sometimes just a cold glass of milk or a hot cup of coffee, which balances the sweetness perfectly. On weekends, Maya and I enjoy them alongside a dollop of whipped cream or a scoop of vanilla ice cream for a more decadent dessert.
If you’re thinking about serving these bars at a party or potluck, consider adding fresh berries on the side or a light dusting of powdered sugar for presentation. They also make a lovely addition to a brunch spread, where the rich flavor complements eggs and fruit beautifully.
Storage and Reheating Tips
One of the things I appreciate most about this recipe is its convenience when it comes to storage. These bars hold up well in an airtight container at room temperature for up to three days—perfect for those busy weeks when you want a quick snack or dessert on hand. If you want to keep them longer, they freeze beautifully for up to two months. Just wrap individual bars in plastic wrap and place them in a freezer-safe container or bag.
When it’s time to enjoy your frozen bars, let them thaw at room temperature for about an hour. If you’d like a freshly baked feel, pop a bar in the microwave for 15-20 seconds or warm it in a 300°F oven for 5-7 minutes. This little trick revives the soft, gooey texture that makes these bars so comforting—something I always look for when reheating leftovers for Eli’s after-school snacks.
Frequently Asked Questions
What are the main ingredients for Red Velvet Cookie Bars?
The main ingredients for Red Velvet Cookie Bars include the items listed in our ingredients section above. Each ingredient plays a crucial role in achieving the perfect flavor and texture.
How long does it take to make Red Velvet Cookie Bars?
The total time to make Red Velvet Cookie Bars includes both preparation and cooking time. Check the recipe card above for exact timing details.
Can I make Red Velvet Cookie Bars ahead of time?
Yes, Red Velvet Cookie Bars can often be prepared in advance. Store it properly in an airtight container in the refrigerator and consume within the recommended timeframe.
What can I serve with Red Velvet Cookie Bars?
Red Velvet Cookie Bars pairs well with various sides and accompaniments. Consider the serving suggestions mentioned in the recipe for the best dining experience.
Is Red Velvet Cookie Bars suitable for special diets?
Depending on the ingredients used, Red Velvet Cookie Bars may be adapted for various dietary needs. Check the ingredients list and consider substitutions as needed for your dietary requirements.
Final Thoughts
Red Velvet Cookie Bars are more than just a dessert in my kitchen—they’re a reminder of the simple joys that come from sharing food with loved ones. From my early days of learning to fix a salty chili to hosting affordable Wednesday dinners in college, these bars symbolize the heart of home cooking: turning everyday ingredients into moments of joy. Whether you’re new to baking or looking for a dependable recipe to add to your repertoire, I hope this recipe brings the same warmth and satisfaction to your table as it does to mine.
Remember, cooking is as much about the process as the result. So take your time, enjoy the smells, and don’t be afraid to make this recipe your own. After all, if Eli’s happy to eat it without bargaining, you know you’ve hit the mark. You’ve got this!
